
Standard product label printing process
The process of creating beautiful, impressive and attractive brand decal labels is very complicated. To avoid spending too much time on arrangement, below are the steps for designing and printing labels.
Step 1: Locate the label
The first step to having a good product label, based on the actual product, is finding the right location to put the label.
The paste position must ensure:
- Users can easily read and view all the contents written on the label.
- The place that attracts the most customers makes the biggest impression.
- Increase product aesthetics.
Labels can be affixed to the outside of the package or placed inside the package, usually made of transparent materials such as glass, cellophane, or clear plastic (provided the label does not affect the quality of the product in the package), the product label can be placed inside.
Step 2: Design the label
Designing a beautiful, attractive and informative label is the key to attracting customers' attention. To design a beautiful label, you need to pay attention to the following factors:
Color:
Bright colors are not always the only way to make an impression, you need to know how to choose the right color, the right quality, the right product to create a unique quality that is not easily confused.
Size:
The size of the label must be appropriate to the characteristics of the product or packaging.
Form:
By using an unusual form, you can really draw attention to your brand. Depending on the complexity of the form design, this requires an initial economic investment and can be risky.
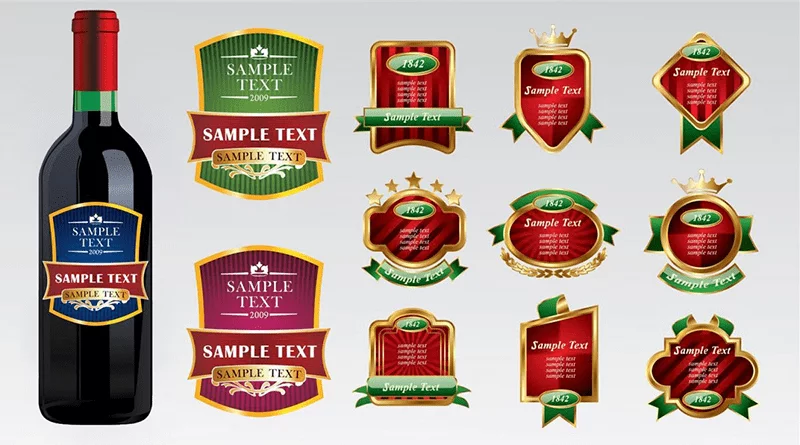
The form of the labels has many diverse designs to attract customers.
Image:
Images are the way for manufacturers to convey advertising messages to consumers. With the strong development of graphic arts and photography, label design now has more advantages because of the many supports.
Content:
Customers say they only have a few seconds to scan products while shopping and only have time to read a few words. Therefore, the words on product labels should be short and designed to be easy to read. For important words, you should use slightly larger fonts so they can be read within a few steps.
Product labels usually contain information such as: product name, barcode, logo, brand, manufacturing date, uses, instructions for use, quantity, expiration date, etc. depending on the product. You can choose all or some of the most important information to include on the label.
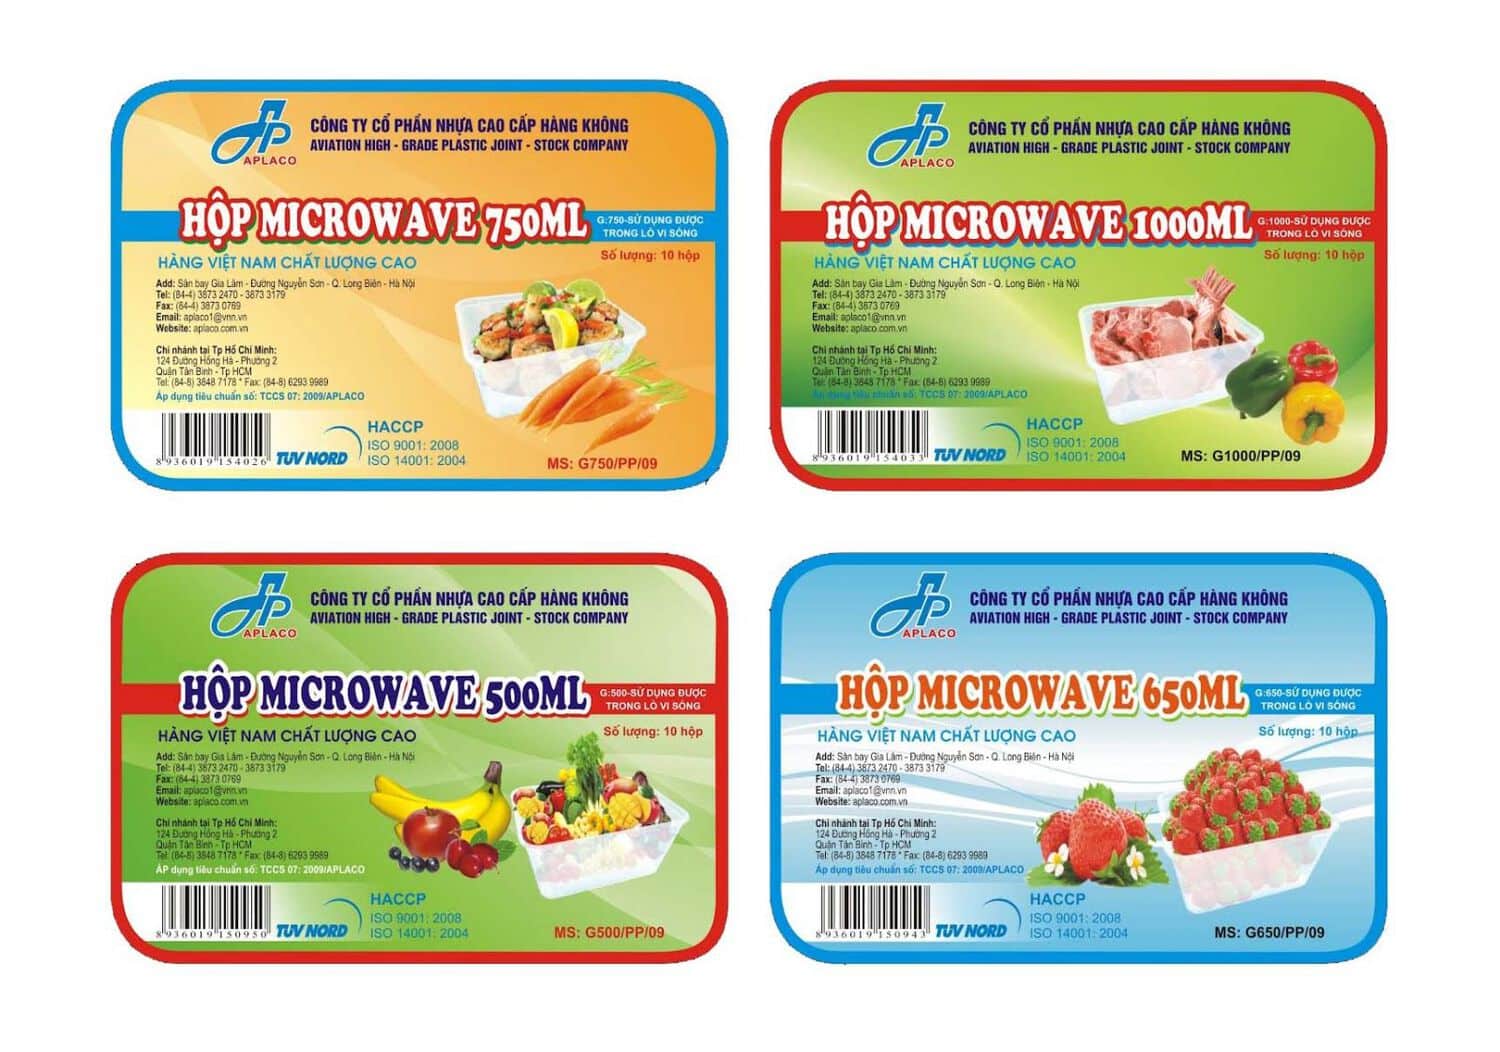
The content of the labels must be clearly designed, easy to read and easy to understand.
Font:
You should choose characters that are easy to read but not too rough, intricate but not too fussy.
Language:
Mandatory content displayed on product labels must be in Vietnamese, unless permitted to be written in a scientific language of Latin origin.
Step 3: Print labels
Before sending it to a printing company, you must think about the materials used to make it.
- Choose the most suitable material to print the product line: paper decal, plastic decal, fabric decal, silver decal, etc.
- Choose between glossy or matte lamination: matte lamination or laminate always gives it a classy and classic look, while glossy coating gives some extra effects to the label making it shiny, reflecting every look.
- Choose the appropriate printing technology: Offset printing, screen printing, inkjet printing.
- Choose the right ink: Nowadays you can choose from a variety of inks available in the market, from resin ink, barcode wax, barcode ink, etc. The ink must be selected to suit the material and printing technology.
Screen printing method:
It is often applied in small-volume printing units. However, this printing process can only print 1 to 2. You need to pay attention that the text or image printed on the decal is not too small.
Inkjet printing method:
Inkjet printing, also known as digital printing process, is based on the principle of Computer to Press - instant printing technology.
An important part of this inkjet printing process is that the file is transferred directly from the computer control system to the printer after it has been through the RIP application. In the case of large digital prints, the file system used is no different than for other types of digital prints.
This printing method uses reference formats such as Pdf, Ps, Eps, Tiff, Jpg, but the most popular is the Tiff format. Depending on the size of the published product, the output file will have different resolutions.
The biggest advantage of digital printing technology is fast delivery time; Flexible printing process with many types of paper, instant printing, eliminating intermediate levels such as plate making and plate analysis, thus saving costs.
Offset printing method:
With offset printing, an inked image is transferred to a rubber blanket (also known as an offset plate) and then transferred to paper. When used with lithography, this technique prevents water from penetrating the paper along with the ink.
Using Offset printing technology will give higher image quality, sharper and cleaner than printing directly from paper, because the rubber cushion is evenly coated on the surface to be printed. Ability to print on many surfaces, including uneven surfaces (such as wood, fabric, metal, leather, sandpaper).
Moreover, the production of prints is easier, the prints are more durable because they do not have to come into direct contact with the surface to be printed. Offset printing has become the most popular printing technique in commercial printing today. The most important criteria to evaluate the quality of offset printing is that the printed sheet must be similar to the sample in color and the printed sheet must be uniform (no color variation) throughout the production process.
In addition to the above problems, you also need a suitable printer and after printing, you need to process the brands to make them more beautiful, more durable, etc.

Step 4: Processing, packaging and labeling the product
After printing the stamp, you proceed to process it. In this case, you can laminate it or cut it along the stitching lines like other stamps so that the stamp will last longer and look better.
Once the stamp has been printed easily, the final job is to re-stick the stamp as described and when necessary, it can be removed to glue or stick on existing products.
If the models are made of decals, you can simply scrape them with glue on the product, if they are made of other materials, you may need glue, rivets or screws to fix the packaged product.
Share:


